komodovapes
The Komodo Disposable Vapes

If you’re looking for a vaping solution that combines simplicity, convenience, and style, Komodo Disposable Vapes might just be your perfect match. Designed with ease of use and portability in mind, these disposables are ideal for both beginners and experienced vapers seeking a hassle-free experience.


What Are Komodo Disposable Vapes?

Komodo Disposable Vapes are pre-filled, pre-charged vaping devices that require no maintenance or assembly. Simply use them straight out of the box, and once they’re empty, dispose of them responsibly. They’re perfect for on-the-go use or for those who prefer a low-maintenance vaping option.

Key Features:

  • Pre-Filled E-Liquid: Comes with a variety of flavor options to suit every taste.
  • Pre-Charged Battery: No need to worry about charging—ready to use from day one.
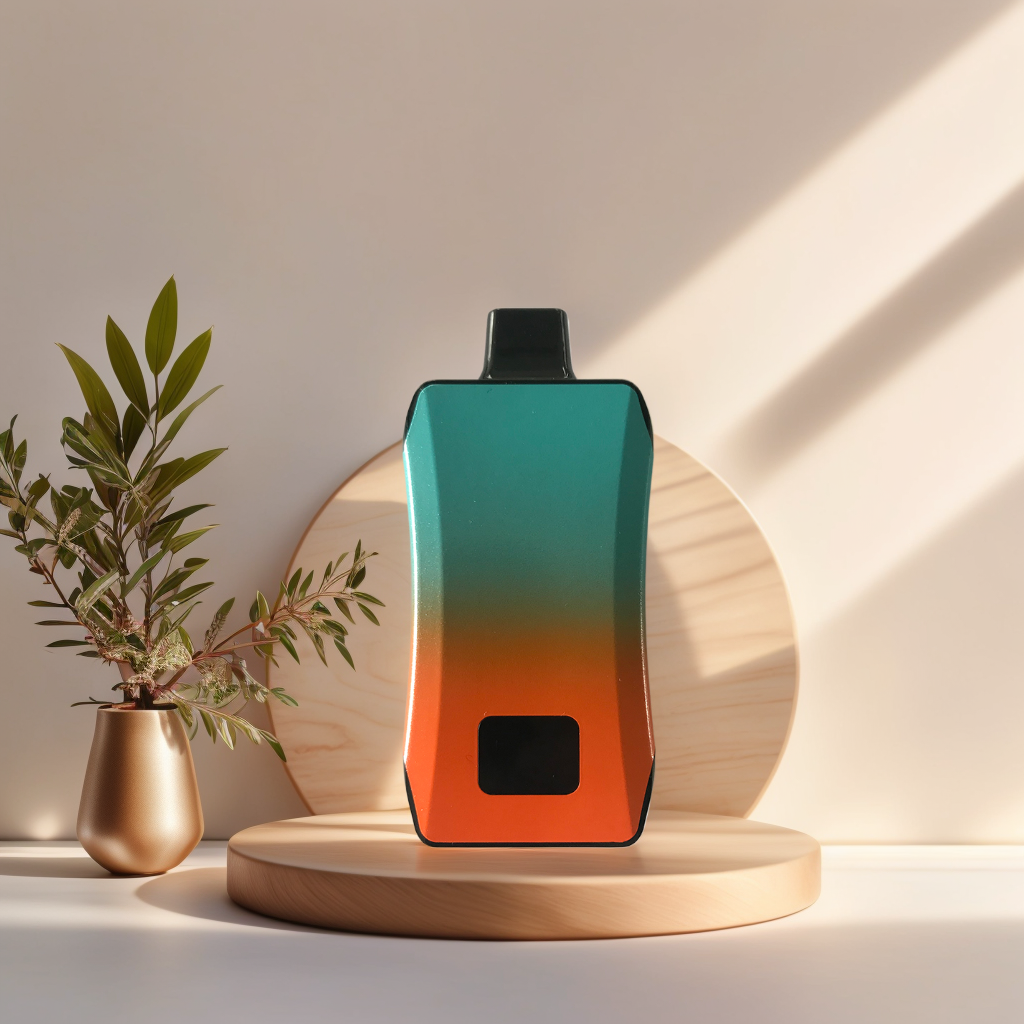
  • Compact Design: Slim, lightweight, and discreet, making it easy to carry anywhere.
  • No Refilling or Maintenance: Use and dispose, eliminating the need for cleaning or upkeep.

Why Choose Komodo Disposable Vapes?

Ease of Use
Komodo disposables are draw-activated, meaning there are no buttons or complicated settings to worry about. Simply inhale to start vaping.

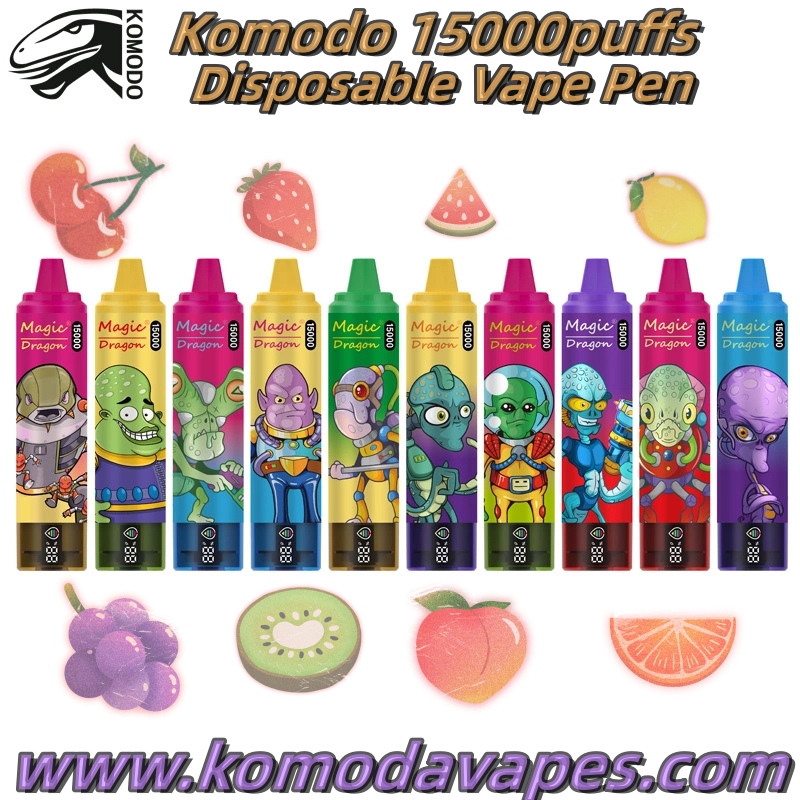
Wide Range of Flavors
Komodo offers a diverse selection of flavors, from fruity blends to classic menthol and tobacco. There’s something for everyone.

Affordable and Accessible
With no additional accessories required, Komodo disposables provide a cost-effective way to enjoy vaping.

Perfect for Travel
The compact size and lightweight design make these vapes ideal for vacations, commutes, or social outings.


How to Use a Komodo Disposable Vape

Unbox the Device
Remove the Komodo disposable vape from its packaging.

Check the Mouthpiece
Ensure the mouthpiece is clean and free of debris before use.

Start Vaping
Inhale gently from the mouthpiece to activate the device.

Dispose Responsibly
Once the vape stops producing vapor or the flavor diminishes, dispose of the device according to local recycling or waste disposal guidelines.


Who Are Komodo Disposable Vapes For?

  • Beginners: Simple and straightforward, no need for prior vaping experience.
  • Casual Vapers: Ideal for those who vape occasionally and want an easy option.
  • Travelers: Portable and lightweight for on-the-go vaping.
  • Experienced Users: A great backup device for seasoned vapers.

Recommended Komodo Disposable Vape Flavors

  • Fruity Mixes: Perfect for those who love sweet and tangy blends.
  • Menthol Chill: For a refreshing, cool sensation.
  • Classic Tobacco: A go-to option for traditionalists.
  • Unique Blends: Explore Komodo’s creative flavor combinations for something new.

Where to Buy Komodo Disposable Vapes

Komodo Disposable Vapes are available at most vaping retailers and online stores. Be sure to purchase from a reputable source to guarantee authenticity and quality. For premium vaping products, check out Komodo vapes Store, which offers a wide selection of disposable vapes and vaping accessories.


Final Thoughts

Komodo Disposable Vapes are the ultimate choice for anyone seeking a convenient, affordable, and enjoyable vaping experience. With their sleek design, wide flavor selection, and ease of use, they’re a top contender in the disposable vape market. Try Komodo Disposable Vapes today and experience hassle-free vaping at its finest!

How to Use a Hookah: A Beginner’s Guide

Hookah smoking has been a cultural tradition for centuries and is often associated with relaxation and social gatherings. If you’re new to using a hookah, follow these steps to set it up and enjoy it responsibly.

What You’ll Need

  1. A hookah set (base, stem, tray, hose, and bowl)
  2. Hookah tobacco (shisha)
  3. Charcoal (preferably quick-light or natural)
  4. Aluminum foil or a heat management device
  5. Tongs (for handling charcoal)
  6. Water
  7. A lighter or coal burner

Step-by-Step Instructions

1. Assemble the Hookah

  • Connect the Base and Stem: Fill the base with water until it covers the bottom of the stem by about 1–2 inches.
  • Attach the Stem: Ensure it’s secure and airtight with the grommet.
  • Add the Tray: Place the tray on the stem to catch ash or falling coal.

2. Prepare the Bowl

  • Add Shisha: Break up the shisha tobacco with your fingers and loosely fill the bowl. Do not pack it too tightly; airflow is key.
  • Cover with Foil: Use heavy-duty aluminum foil to cover the bowl, keeping it taut. Poke small holes evenly across the foil using a toothpick or a pin. Alternatively, use a heat management device if available.

3. Light the Charcoal

  • Quick-Light Charcoal: Use a lighter to ignite it, letting it spark fully before placing it on the foil.
  • Natural Charcoal: Heat it on a coal burner until it’s fully red and glowing.

Place the lit charcoal evenly on the foil or heat management device.

4. Connect the Hose

Attach the hose to the stem using its designated port. Make sure the connection is airtight.

5. Start Smoking

  • Take slow and steady puffs to draw the smoke into the chamber.
  • Once the smoke becomes smooth and flavorful, enjoy at your leisure.

6. Adjust as Needed

  • If the smoke feels harsh, check the water level, the number of coals, or the airflow.
  • For lighter smoke, reduce the coal. For stronger smoke, add another piece of coal.

Tips for a Better Hookah Experience

  1. Use Cold Water: Add ice or chilled water for a smoother smoke.
  2. Clean the Hookah Regularly: Rinse the stem, base, and hose after every use to maintain freshness.
  3. Control Heat: Move the coals around the bowl to prevent burning the shisha.
  4. Don’t Share Mouthpieces: For hygiene, use disposable mouth tips when smoking with friends.

Safety First

  • Always use the hookah in a well-ventilated area.
  • Handle charcoal carefully to avoid burns or accidents.
  • Limit your session duration and frequency, as hookah smoking has health risks similar to other forms of smoking.
How to Use a Disposable Vape Pen with a Button

Disposable vape pens are an increasingly popular choice for their convenience and simplicity. Unlike traditional vape devices, these pens are pre-filled, pre-charged, and require minimal effort to operate. While some disposable vape pens are button-free, others come with a small button that offers additional control. Here’s a step-by-step guide on how to use a disposable vape pen with a button.


Step 1: Understand Your Vape Pen

Before using your disposable vape pen, check its design. Pens with buttons typically allow you to turn the device on or off and adjust the heating element or power. Read any instructions or labels on the packaging to confirm its features.


Step 2: Turn the Vape Pen On

Most disposable vape pens with buttons require a few clicks to turn them on.

  1. Press the button 5 times quickly: This is the standard method for powering on or off most button-activated devices.
  2. Once the pen is on, you might see a light indicator to confirm its activation.

Step 3: Activate the Heating Element

With the pen powered on, you can now start vaping.

  1. Press and hold the button while inhaling: The button activates the heating element, which vaporizes the e-liquid inside.
  2. Release the button after you finish inhaling. This prevents overheating or unnecessary power use.

Step 4: Adjust Settings (If Applicable)

Some disposable vape pens allow you to adjust power or temperature:

  1. Click the button 3 times to cycle through power levels.
  2. Light indicators may change color to show different power settings, such as low, medium, or high.

Adjusting the power level lets you customize the vapor intensity and flavor experience.


Step 5: Practice Safe Usage

  • Take slow, steady puffs to avoid overheating the coil or burning the e-liquid.
  • Allow a few seconds between puffs to let the heating element cool down.
  • If the device has an auto-shutoff feature, it may stop working temporarily after prolonged use. Let it rest for a moment before resuming.

Step 6: Turn the Pen Off After Use

To conserve battery life and prevent accidental activation, turn off your pen after use:

  • Press the button 5 times quickly to power it down.

Troubleshooting Common Issues

No Vapor Production

  • Ensure the pen is turned on.
    • Check if the button is responding; you may need to recharge or replace the device if it’s unresponsive.

Burnt Taste

  • Avoid holding the button too long during puffs, as this can overheat the e-liquid.

Light Blinks but No Vapor

What is a Wax Pen? The Ultimate Guide to Wax Vaporizers

If you’re new to the world of wax concentrates, you may have heard of wax pens. They’re sleek, portable devices designed specifically for vaporizing concentrates like wax, shatter, and other thick extracts. For those looking for a powerful and convenient way to enjoy concentrates, wax pens have become the go-to choice. In this post, we’ll dive into what a wax pen is, how it works, and why Longmada offers some of the best wax pens on the market.


What is a Wax Pen?

A wax pen is a type of vaporizer specifically designed for vaporizing wax concentrates. These devices use a heating coil or atomizer to heat the wax to a specific temperature, transforming it into vapor without burning the material. Unlike e-liquid vape pens, which are used for vaping nicotine or other liquid solutions, wax pens are made to handle thicker, more concentrated forms.

Key Components of a Wax Pen:

  • Battery: Powers the pen and typically offers adjustable voltage or temperature settings.
  • Atomizer or Heating Coil: Where the wax is placed and heated. The coil can be made from materials like quartz or ceramic for optimal heat retention.
  • Mouthpiece: Where you inhale the vapor.
  • Temperature Control: Many wax pens offer adjustable temperature settings so you can customize the heat for different wax types or personal preference.

How Does a Wax Pen Work?

Using a wax pen is straightforward. After placing a small amount of wax into the atomizer, the battery heats the coil, which in turn heats the wax to its vaporization point. Here’s a simple guide to using a wax pen:

  1. Load the Wax: Open the chamber and use a dab tool to place a small amount of wax onto the coil. Be careful not to overload, as it can lead to clogging or uneven heating.
  2. Power On: Most pens require you to press the button 5 times to turn on.
  3. Set the Temperature: If your pen has variable temperature settings, start on a lower heat and adjust based on your preference.
  4. Inhale: Press the button (or simply inhale if it’s draw-activated) and enjoy the smooth, flavorful vapor.

Benefits of Using a Wax Pen

  • Portability: Wax pens are compact and discreet, allowing you to enjoy concentrates on the go.
  • Ease of Use: Unlike traditional rigs or other complex setups, wax pens are designed to be user-friendly.
  • Customizable Temperature: Adjustable temperature control means you can achieve the ideal heat for your concentrate, balancing flavor and vapor production.
  • Efficient and Effective: Wax pens use efficient heating methods, allowing you to enjoy maximum potency and flavor from your wax.
How to Use a Hot Knife for Dabs

Dabbing is a popular way to enjoy concentrates, and using a hot knife for dabs is an efficient and mess-free method. A hot knife simplifies the process of handling sticky or gooey concentrates, ensuring a cleaner and smoother experience. Here’s a guide on how to use a hot knife for dabs, step by step.


What Is a Hot Knife for Dabs?

A hot knife is a specialized tool designed for vaporizing concentrates. It typically features:

  • A heating element that warms the blade.
  • A non-stick surface for handling concentrates.
  • Portability and safety features, making it a convenient option for dabbing enthusiasts.

What You’ll Need

  • Hot Knife: Ensure you have a reliable device like the Longmada Hot Knife for precision and safety.
  • Dab Rig or E-Nail: Used for vaporizing the concentrate.
  • Concentrate: Wax, shatter, or any other dabbing material of your choice.
  • Torch (if using a traditional rig): For heating your rig.

Steps to Use a Hot Knife for Dabs

Prepare Your Dab Rig

    • If you’re using a traditional rig, heat the nail with a torch until it glows. Let it cool slightly to avoid burning the concentrate.
    • If you’re using an e-nail, set it to the desired temperature (around 300–400°F for low-temp dabs).

Turn On the Hot Knife

    • Power on the hot knife and allow it to heat up. Most devices reach the optimal temperature within seconds.

Load the Concentrate

    • Use the heated blade of the hot knife to cut and lift a small amount of concentrate. The non-stick blade ensures easy handling and prevents wastage.

Place the Concentrate

    • Position the hot knife over the heated nail or e-nail. Allow the concentrate to drop onto the nail, where it will vaporize instantly.

Inhale and Enjoy

    1. Use the mouthpiece of your dab rig to inhale the vapor. Rotate the knife slightly to ensure the entire concentrate melts off the blade.

Clean the Hot Knife

    1. After use, wipe the blade with a non-abrasive cloth to remove residue. This step ensures the tool remains clean and functional for your next session.

Tips for Using a Hot Knife

  • Start with Small Dabs: Begin with a small amount of concentrate, especially if you’re new to dabbing.
  • Choose the Right Temperature: Lower temperatures preserve flavor, while higher temperatures produce thicker vapor.
  • Handle with Care: Avoid touching the heated blade directly, and always store the knife safely after use.
  • Use a Reliable Brand: Opt for trusted products like Longmada’s Hot Knife, known for durability and efficiency.

Benefits of Using a Hot Knife for Dabs

Versatility: Suitable for various types of concentrates.

Mess-Free Handling: Prevents sticky residue and wasted concentrates.

Precision and Control: Makes it easier to handle small amounts of concentrate.

Portability: Perfect for on-the-go dabbing sessions.

How to Fix a Vape Cartridge That Says “No Atomizer”

Seeing the dreaded “No Atomizer” message on your vape device can be frustrating, but the good news is that it’s often a simple issue to resolve. This error typically means your device isn’t detecting the cartridge or coil, which can happen for several reasons. Here’s a step-by-step guide to diagnose and fix the problem.


1. Check the Connection Points

The most common reason for the “No Atomizer” message is a poor connection between the cartridge and the battery.

  • Inspect the Threads: Ensure the cartridge and battery threads are clean and free of debris. Use a cotton swab dipped in isopropyl alcohol to gently clean the contact points.
  • Tighten the Cartridge: Make sure the cartridge is screwed in snugly, but avoid overtightening as this can damage the threads or the center pin.

2. Inspect the Cartridge

If the connection is secure and the error persists, the cartridge itself might be the issue.

  • Check for Damage: Look for visible cracks or leaks in the cartridge. Damaged cartridges should be replaced.
  • Test Another Cartridge: Attach a different, working cartridge to your device to see if the problem lies with the original one.

3. Examine the Battery Pin

The center pin of your vape battery is responsible for connecting with the atomizer.

  • Adjust the Pin: If the pin has been pushed too far in, gently pry it up with a small tool like a paperclip. Be careful not to damage it.
  • Check for Misalignment: Ensure the pin is centered and can make proper contact with the cartridge.

4. Test the Coil Resistance

If you’re using a refillable cartridge with a coil, the problem might be the coil itself.

  • Check for a Burnt Coil: A burnt or damaged coil may not be detected by the device. Replace the coil if necessary.
  • Ensure Compatibility: Some coils have a resistance that’s outside the range supported by your vape device. Verify that the coil resistance matches your device’s specifications.

5. Restart the Device

Sometimes, a simple restart can fix the issue.

  • Turn off your vape device completely.
  • Unscrew the cartridge, wait a few seconds, and screw it back in.
  • Power the device back on and check if the error clears.

6. Try a Firmware Update (If Applicable)

If your vape device has updatable firmware, a software glitch could be causing the issue. Check the manufacturer’s website for the latest firmware updates and install them if available.


7. When to Seek Professional Help

If you’ve tried all the above steps and the problem persists, it might be time to contact the manufacturer or visit a local vape shop. They can help identify and fix hardware issues that aren’t easily visible.


Longmada Products: Reliable and Hassle-Free Vaping

For a smoother vaping experience, consider using Longmada’s premium atomizers and cartridges. Our products are designed with top-tier materials to ensure a secure connection and consistent performance, minimizing issues like “No Atomizer” errors.

  • Upgraded Coils: Engineered for efficiency and reliability.
  • Durable Construction: Built to last, reducing the need for frequent replacements.
  • Easy Maintenance: Simple to clean and maintain for trouble-free vaping.

Conclusion

The “No Atomizer” message can often be resolved with basic troubleshooting steps, such as cleaning the connections, adjusting the battery pin, or replacing a faulty cartridge. To avoid frequent issues, invest in high-quality vaping hardware like those from Longmada, which are designed for durability and ease of use.

Explore the Longmada Store today for reliable and efficient vaping solutions!

How to Fix a Disposable Vape Pen: A Step-by-Step Guide

Disposable vape pens are designed for convenience and ease of use, but occasionally, they may stop working before the e-liquid is finished. If your disposable vape pen is malfunctioning, don’t throw it away just yet—here are some tips to get it working again.


1. Problem: No Vapor Production

If your disposable vape pen isn’t producing vapor, the issue may lie with the battery or airflow.

Solutions:

  • Check the Airflow Holes: Blocked airflow holes can prevent vapor production. Inspect the pen for dirt or debris and clean the holes gently with a pin or toothpick.
  • Activate the Battery: Some pens require a gentle draw to activate the battery. Ensure you’re inhaling firmly but not too hard.
  • Inspect for Dead Battery: If the pen’s light doesn’t blink or turn on when you inhale, the battery might be dead. Unfortunately, disposable pens with dead batteries cannot be recharged.

2. Problem: Weak or Burnt Taste

If your vape tastes burnt or the vapor is weak, it’s likely an issue with the coil or e-liquid.

Solutions:

  • Prime the Coil: If the pen hasn’t been used for a while, the e-liquid may not have fully soaked into the coil. Allow the pen to rest upright for a few minutes to let the liquid saturate the coil.
  • Avoid Overuse: Drawing too frequently can cause the coil to overheat. Take slower, gentler puffs to improve the flavor.

3. Problem: Leaking E-Liquid

Leaking e-liquid is a common issue with disposable vape pens.

Solutions:

  • Inspect for Damage: Check the pen for cracks or damage to the tank or casing. If the pen is damaged, it may not be fixable.
  • Keep Upright: Always store the vape pen upright to prevent leaks.
  • Clean the Mouthpiece: If e-liquid has pooled in the mouthpiece, wipe it clean with a tissue or cotton swab.

4. Problem: Clogged Mouthpiece or Airflow

If the pen feels difficult to draw from, the mouthpiece or airflow may be clogged.

Solutions:

  • Clear the Mouthpiece: Gently blow into the mouthpiece to dislodge any blockages.
  • Use Heat: If the e-liquid has thickened and clogged the airflow, warm the pen in your hands or place it in a warm (not hot) environment for a few minutes. This can help thin the liquid and restore airflow.

5. Problem: Device Won’t Activate

Some disposable vape pens fail to activate due to internal malfunctions.

Solutions:

  • Tap the Pen Lightly: Sometimes, internal components may shift, especially if the pen has been dropped. Lightly tap the pen to realign the components.
  • Check for Manufacturer Defects: If none of the solutions work, the device may be defective. Contact the seller or manufacturer if the pen is under warranty.

6. Preventing Disposable Vape Issues

  • Store Properly: Keep your vape pen in a cool, dry place away from direct sunlight or heat.
  • Avoid Dropping: Handle the pen carefully to prevent internal damage.
  • Use Gently: Avoid over-inhaling or drawing too forcefully, as this can strain the coil and battery.

When to Replace a Disposable Vape Pen

If all troubleshooting efforts fail, it might be time to replace your disposable vape pen. These devices are intended for limited use, so a malfunction may indicate that the device has reached the end of its lifespan.

How to Clean Your Vape Coil: Step-by-Step Guide for a Better Vaping Experience

Cleaning your vape coil can be a great way to extend its life, maintain better flavor, and improve overall vapor quality. While coils will eventually need replacing, a simple cleaning routine can help keep them functioning well for longer. Here’s a guide on how to clean your vape coil and keep your device performing at its best.


Why Clean Your Vape Coil?

Regularly cleaning your vape coil offers several benefits:

  • Improved Flavor: Residue buildup can create a burnt taste. Cleaning removes old residue, so you taste the true flavor of your e-liquid or concentrate.
  • Better Vapor Production: A clean coil allows your device to produce thicker, more flavorful vapor.
  • Longer Coil Life: Proper maintenance helps you get more use from your coil, which saves you money in the long run.

Two Methods for Cleaning Vape Coils

There are two main ways to clean a vape coil: quick rinse and deep cleaning. Quick rinsing is effective for a coil in good condition but with light residue buildup, while deep cleaning is best for coils with significant residue or heavy use.


Method 1: Quick Rinse (for Light Buildup)

  1. Remove the Coil: Take the coil out of your vape tank.
  2. Rinse with Warm Water: Run warm water over the coil to remove any leftover e-liquid.
  3. Blow Out Excess Water: Gently blow into the coil to push out water from the cotton wick.
  4. Dry with Paper Towels: Place the coil on a paper towel to dry completely. Allow it to air dry for several hours (or overnight if possible).
  5. Reassemble and Prime: Once dry, put the coil back in, fill the tank, and prime the coil (let it sit with e-liquid for a few minutes before vaping).

Method 2: Deep Cleaning (for Heavy Residue)

  1. Remove and Rinse the Coil: Take the coil out and rinse it under warm water to remove surface residue.
  2. Soak in Cleaning Solution: Fill a container with a cleaning solution (such as vodka, rubbing alcohol, vinegar, or hot water). Soak the coil in this solution for 1-2 hours to dissolve more stubborn residue.
  3. Rinse Thoroughly: After soaking, rinse the coil under warm water again to remove all traces of the cleaning solution.
  4. Blow Out Excess Water: Gently blow through the coil to push out as much water as possible.
  5. Air Dry Completely: Set the coil on a paper towel to air dry. Let it dry fully (overnight, if possible) to avoid any water-related damage to your device.
  6. Reassemble and Prime: Once dry, place the coil back in your device and refill your tank. Be sure to prime the coil by letting it sit with e-liquid before using.

Important Tips for Cleaning Your Vape Coil

  • Don’t Use Dish Soap: Dish soap can leave a residue and affect the taste of your e-liquid. Stick to plain water or a mild cleaning solution like vodka or alcohol.
  • Avoid Excessive Heat: Don’t try to dry the coil with high heat, such as from a microwave or oven, as this can damage the coil’s components.
  • Prime Your Coil After Cleaning: Let your coil sit in e-liquid for a few minutes before using it to ensure that the wick is fully saturated.

When to Replace Your Coil

While cleaning can extend the life of a vape coil, there will come a time when it’s best to replace it. Replace your coil if:

  • You notice a persistent burnt taste that won’t go away even after cleaning.
  • The coil produces less vapor than usual.
  • You experience leaking or gurgling sounds when vaping.

By following these steps, you can keep your vape coil clean and enjoy the best flavor and vapor quality from your device. Regular coil maintenance helps improve your vaping experience and saves you money on replacements.